Documentation Index
Fetch the complete documentation index at: https://developer.runa.io/llms.txt
Use this file to discover all available pages before exploring further.
Introduction
When using API endpoints you only get data back when you make a call. This is great for when you want to know the current state of something now, but it’s not ideal for when you want to know when something changes in the future. Webhooks are a way to receive real-time updates from Runa whenever something changes the moment it happens.Receiving webhooks
At their core webhooks are just aPOST request to a URL you provide; a bit like a reverse API call. Normally you would provision an endpoint specifically for receiving Runa webhooks.
Your endpoint should return a 200 status code to indicate that the webhook was received and processed successfully.
As your webhook endpoint will be accessible from the internet, you should verify that each request is coming from Runa.
Webhook events
We currently support the following webhook events:Order completion
The
order.completion webhook is triggered when an order has finished
processing.Product update
The
product.update webhook is triggered when a product in the catalog is
updated.Adding an endpoint
Enter the webhook portal
From the API section in your Runa account, click View webhook. This will open your webhook portal, powered by Svix.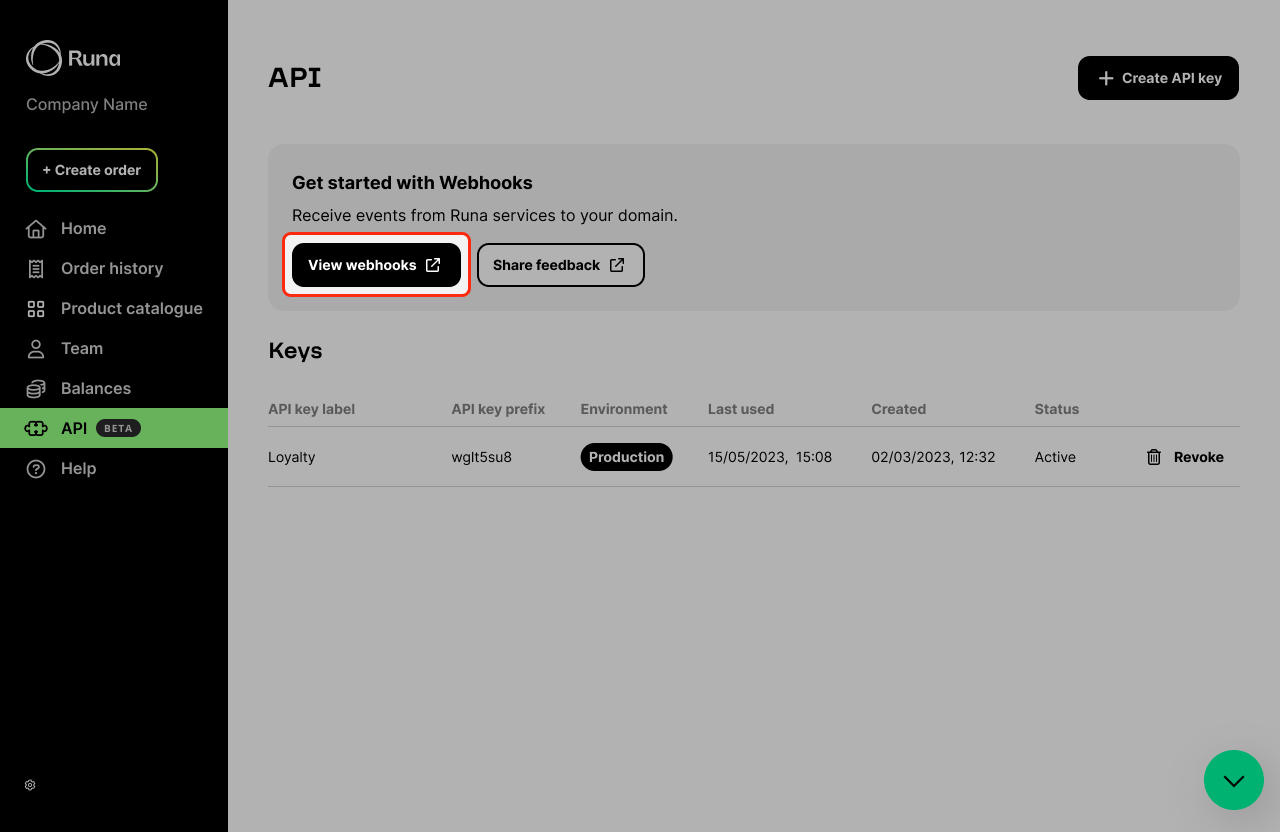
Add an endpoint
Once in the webhook portal, click Add new endpoint. This will open a form where you can enter the URL of your endpoint. You can optionally add a description.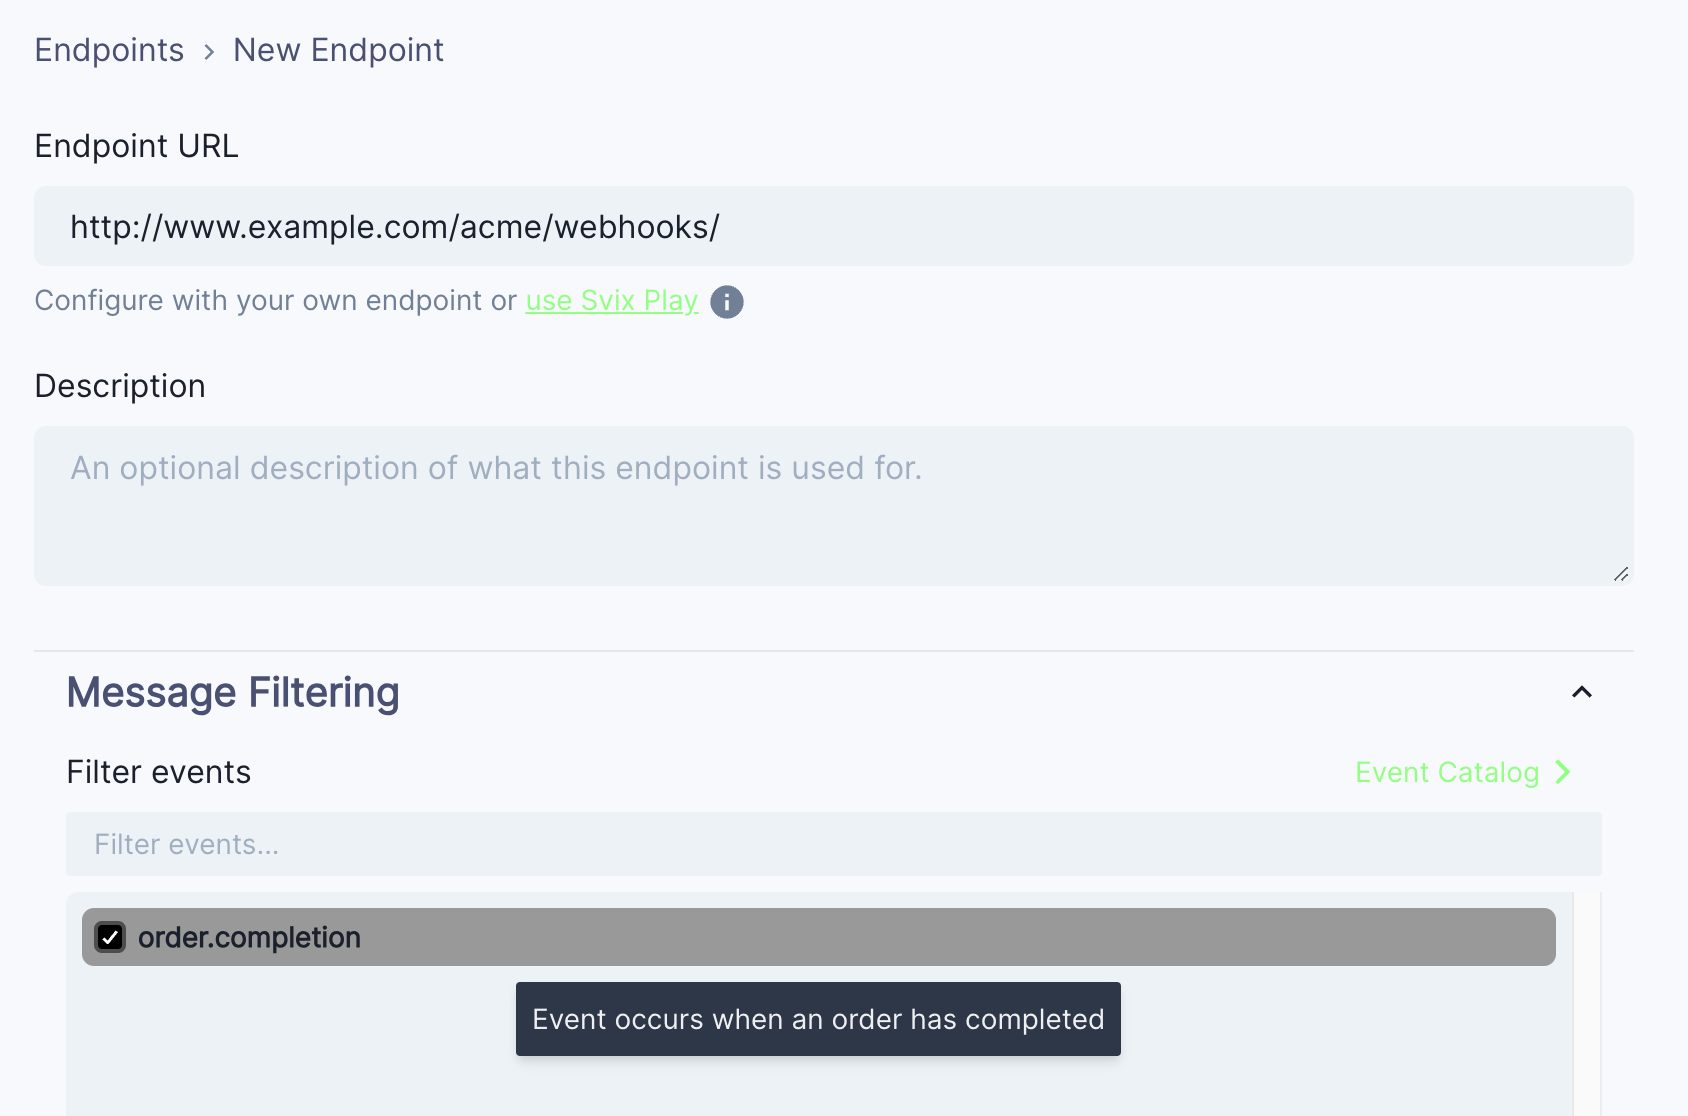
If you don’t have a URL or your service isn’t quite ready to start receiving events just yet, just press the use Svix Play button to have a unique testing URL generated for you.You’ll be able to view and inspect events sent to your Play URL.
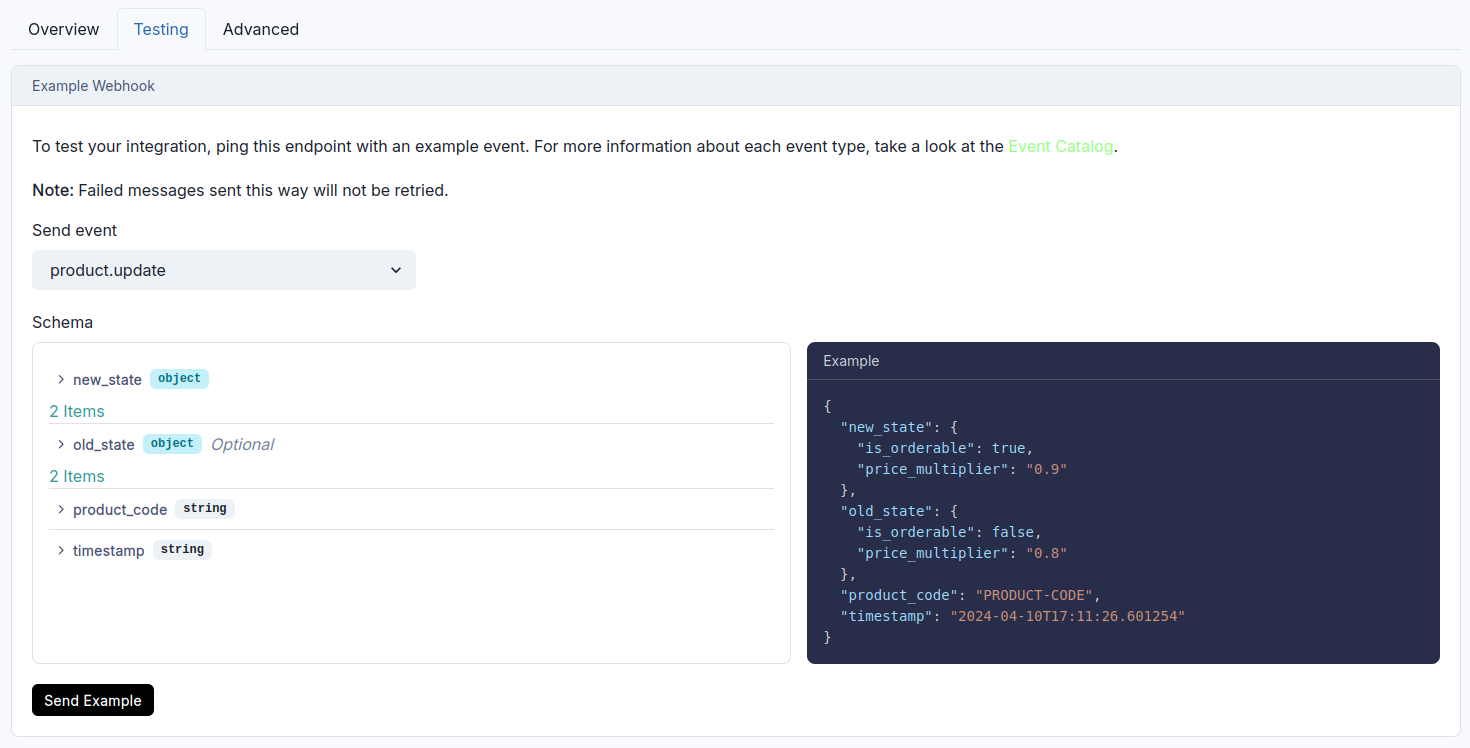
Testing your endpoint
Webhooks are currently unsupported in the playground
environment. You should use the test
function in the webhook portal instead.
Securing your endpoint
As your endpoint for receiving webhooks will be accessible from the internet, you should secure it to ensure only events from Runa are accepted.Signature verification
Every event we send is signed with a signature. You can verify the signature by checking thesvix-signature header in the request. Our webhook partner Svix offers a set of useful libraries that make verifying webhooks very simple. Here is an example using Javascript:
Signature verification example
IP allowlisting
In case your webhook receiving endpoint is behind a firewall or NAT, you may need to allow traffic from Svix’s IP addresses. This is the full list of IP addresses that webhooks may originate from:Failure handling
If we are unable to deliver a webhook to your endpoint, we will retry several times before giving up. If all attempts to a specific endpoint fail for a period of 5 days, the endpoint will be disabled.Retrying failed deliveries
Svix attempts to deliver each webhook message based on a retry schedule with exponential backoff. Each message is attempted based on the following schedule, where each period is started following the failure of the preceding attempt:- Immediately
- 5 seconds
- 5 minutes
- 30 minutes
- 2 hours
- 5 hours
- 10 hours
- 10 hours (in addition to the previous)
Manual retries
You can also use the application portal to manually retry each message at any time, or automatically retry all failed messages starting from a given date.Failure recovery
If all attempts to a specific endpoint fail for a period of 5 days, the endpoint will be disabled. To re-enable a disabled endpoint, go to the webhook dashboard, find the endpoint from the list and select “Enable Endpoint”.Recovering/Resending failed messages
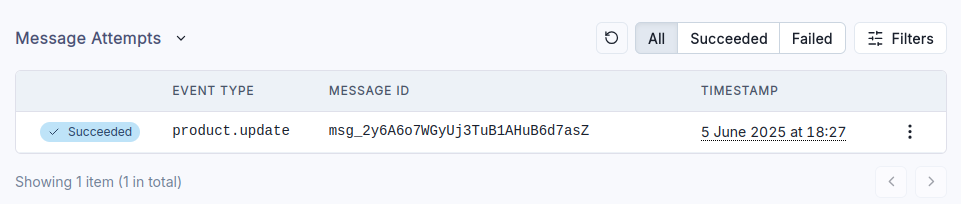
If your service has had downtime or was misconfigured you may have missed some messages. You can resend specific messages or resend all failed messages starting from a given date.Resending a single message
If you want to replay a single event, you can find the message from the UI and click the options menu next to any of the attempts.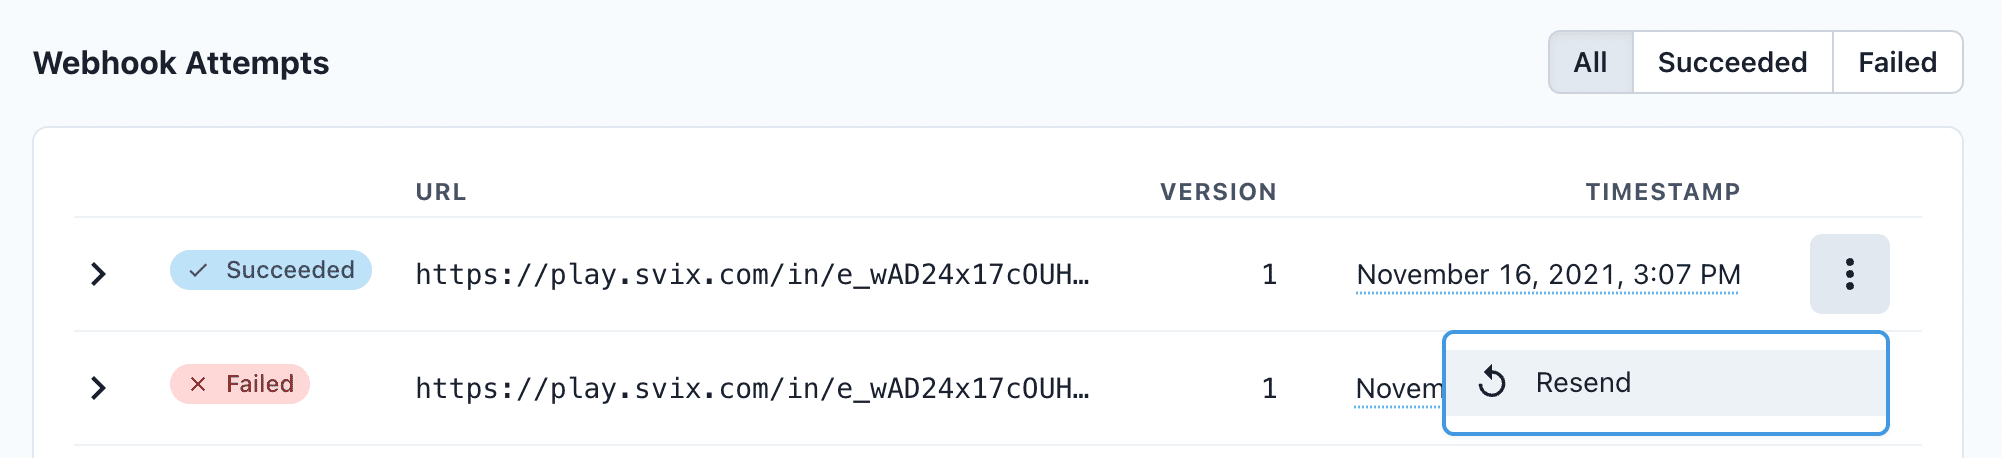
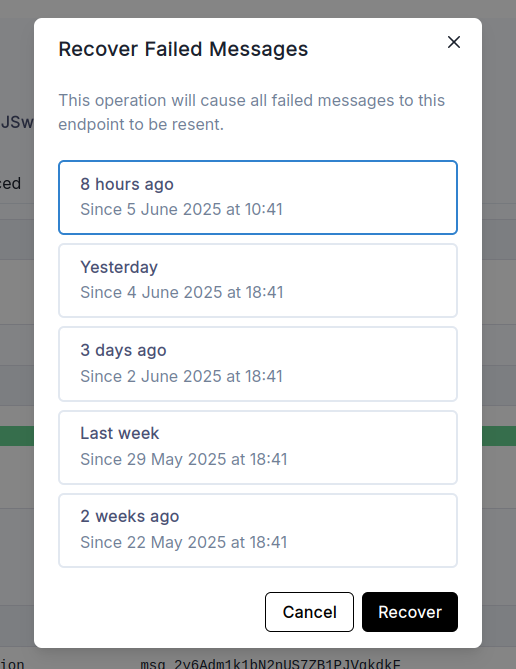
Resending all failed messages
If you need to recover from a service outage and want to replay all the failed messages since a given time, you can do so from the Endpoint page. On an endpoint’s details page, click Options > Recover Failed Messages.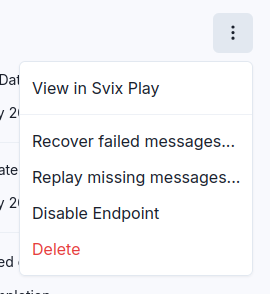
Troubleshooting
There are some common reasons why your webhook endpoint is not working as expected.Not using the raw payload body when verifying the signature
This is the most common issue. When generating the signed content, we use the raw string body of the message payload. If you convert JSON payloads into strings using methods like stringify, different implementations may produce different string representations of the JSON object, which can lead to discrepancies when verifying the signature. It’s crucial to verify the payload exactly as it was sent, byte-for-byte or string-for-string, to ensure accurate verification.Sending a non 2xx response
When we receive a response with a 2xx status code, we interpret that as a successful delivery even if you indicate a failure in the response payload. Make sure to use the right response status codes so we know when message are supposed to succeed vs fail.
Responses timing out
If a message delivery attempt takes longer than 15 seconds to get a2xx response, we will consider it a failed delivery.
If your endpoint needs to complete complex work we suggest you simply receive the message and add it to a queue to be processed asynchronously.